Showing posts with label DIY. Show all posts

Monday, July 7, 2014

Evie's Big Girl Room {A Gallery Wall}


Progress on Evie's room has been slow going. I have had ideas and plans since we moved in (last August!!), but then life happens and projects take time and things cost money and you get knocked up and your buddy craigslist forsakes you. Sigh.

But some progress has definitely been made, so I thought I would share a bit today. Is anyone even still reading this little blog?? I know I've been absent!

Here is the original amateur inspiration board I put together for her room:

 
I've stayed pretty true to the colors and feel of the board. Using that floral fabric to make her curtains definitely helped. I love how fun it is.
 
I actually had another gallery wall up across the room, above her dresser, for a while. But then I decided to hang a mirror over there instead. Not long after, I came across this awesome pic on Pinterest and fell in love. I think it's so cool and different than your typical gallery, and I love how they went all the way up to the ceiling. I would need to gather some more art to truly replicate it, but I'm loving things so far!  
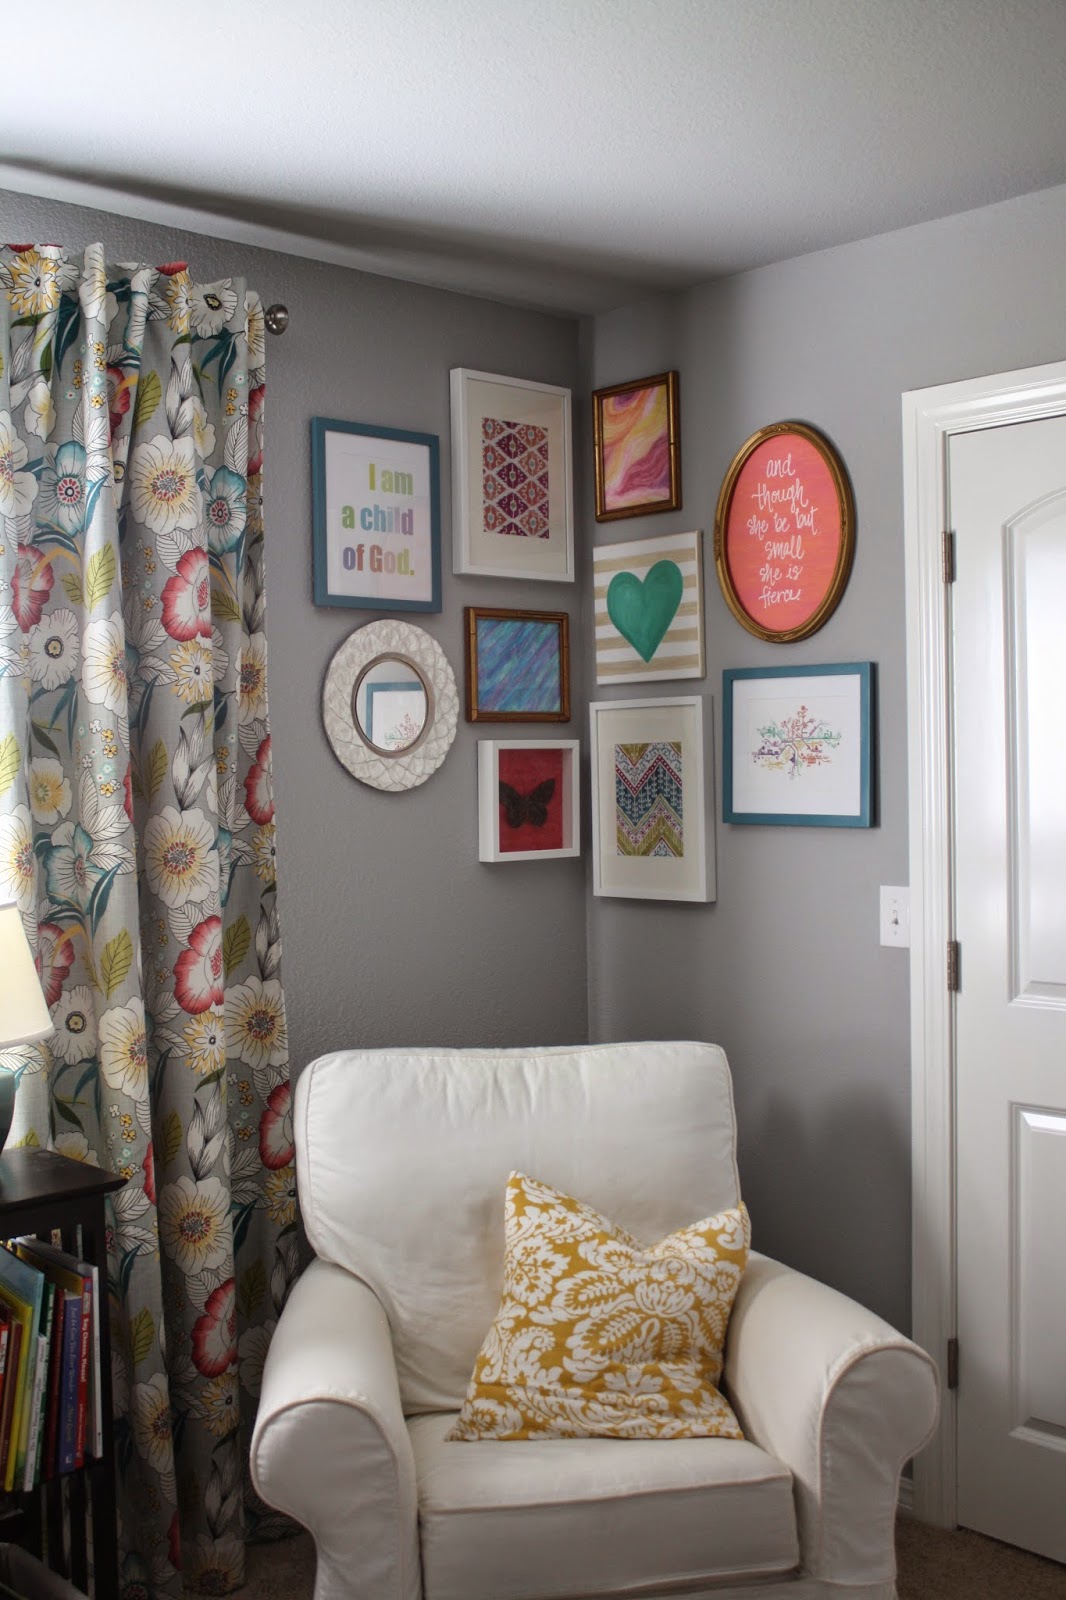
 
 
Everything up there is a diy project of some kind... framed gift wrap, a diy mirror made from a charger, a framed brass butterfly (flea market find), some original art, etc. I just finished the two watercolors (in the gold frames) and I'm not totally satisfied with them, but I needed to get something up! So those will likely change, and I may add a few other tiny pieces to fill things in.
 
This Shakespeare quote is puuuuuurfect for my girl. :)


Hopefully I'll have more to share of her room soon!


Monday, January 28, 2013

Bergere Pair {French Chairs Before & After}

A little before & after action for you today... 


I found this pair of Bergere chairs in really good condition at a thrift store last summer. I had been on the lookout for a pair of French chairs like this for a while, so when I saw the price, I grabbed the tag and ran right up to the register. I wasn't sure exactly how I was going to make them over at that point, but after reading through Jenny's awesome tutorial for reupholstering this type of chair, I knew it was something I wanted to tackle.


I'm really thrilled with how they turned out. I bought the fabric last fall, but didn't start in on this project until about a month ago. So when I pulled it back out, I started second-guessing myself. But I love it!

Here are some close-up shots:


By far the most difficult part of this entire thing was just getting myself motivated to get to work.
Oh, and sanding. I hate sanding.
 
 
So what do you think??
I'm still on the fence as to whether I'm going to keep these or sell them at Lilac Row. However, one certain little somebody has made herself (and her tea party) right at home with the chairs. :)


Linking up:


Tuesday, December 4, 2012

{DIY} White Felt Leaf Wreath


Time to get crafty! I feel like I work on a project every single day, but rarely do I share them with you guys. So it's your lucky day!! Are you excited?

I whipped up this simple wreath today. This is my favorite kind of crafting- only a few supplies needed, plus a warm drink, snack of your choice and a sofa to sit on while you watch re-runs of the Real Housewives of Whatever. Totally my kind of afternoon.

Here's what you need. Straw wreath form (leave the plastic on), white felt, scissors and a million push pins.

Start by cutting out a TON of felt leaves. I think in all, I had a little over 100 leaves. Then just start pinning the leaves onto your wreath form. Just overlap your leaves in a pretty way. Easy peasy. I did go back at the end and pin down the leaves in random places, to keep everything from shifting around.


 TA-DA!

Isn't it festive? Or actually- just really simple and a little modern? I can't decide. But I do love it! It's simple and sleek enough that I want to keep it up all year long, not just during Christmas. So I thought for now I should add a few little metallic berries to Christmas it up:


So what do you think?? 

Ps, I'm just now noticing that the lights on the top portion of our pre-lit tree have gone out. Lovely.

Linking up!

Holiday

Home Stories A2Z


Monday, October 1, 2012

A Desk {Before & After}


A few weekends ago, we set out to hit up a few neighborhood garage sales and I scored this desk for a song.

Aren't neighborhood garage sales the best, by the way? So much less driving around aimlessly, looking for a driveway full of stuff to search through.

I offered the lady $5 less than she was asking and we had ourselves a deal. I knew I wanted to get started on making this piece over right away, because as you can see, my garage is quickly becoming filled with stuff for the upcoming Vintage Market Days event and half-completed projects I need to tend to. Story of my life.


So here's the desk in it's original state. Not too shabby and I knew it could easily be made over. I mixed up some paint from my growing stash and then did a light distressing and stain. I thought the original hardware looked okay, so I just kept it. If I were planning to keep the desk for our home, I would have switched it up, though.


So that's it. The ohsoexciting story behind this latest before & after desk action. There was no wad of money taped to the bottom of one of the drawers or treasure map scribbled in coal on the bottom of the desk. You know I would have put that kind of info up in the title.

Enjoy.


Friday, July 20, 2012

Stripping is for the birds.

So, I may be a little in over my head, here. Last weekend, a friend mentioned that she was looking for someone local to refinish some pieces of furniture. They couldn't get in touch with the guy who had done some pieces for them previously, and were ready to get these done.

So like the geniuses that we are, my hubby and I volunteered my services.

And this is where my dumb diy overconfidence comes to bite me in the @$$.


Here is the first piece when it arrived at our house. She had painted it yellow a few days ago, and it was a rush job. Our friends have a two and a half year old and a 4 month old. So she told me she knew she had rushed this- she was just so excited to get back to a project after a rough couple of months with a sleepless newborn. I can totally relate.

But now they wanted it black again (it was previously painted black). No big deal, right? WRONG.

This baby needed to be stripped. Not just a light sanding before painting... straight up stripped.

Folks, I have never stripped a piece of furniture before. I've definitely painted my fair share, but the pieces were either unpainted wood or I was able to just paint over some old paint. And there was no way I could just paint over this one.

I kind of want to poke my eyes out just thinking about it right now.

Once I realized this is what needed to happen, I went back to this great post about stripping furniture to read up on it and stopped by Lowe's to pick up some supplies. Only they didn't have the Citristrip I was looking for. Curses! So I grabbed something that looked similar and went home to get started.

Yeah, bad idea.

Folks, when you are looking for something specific and don't find it right away, get your baby and your sweaty rear back out into the 106* weather ASAP to get what you need. Don't waste your time staying cool in the A/C, trying out something you've never heard of before. BIG waste of time.


The Citristrip definitely works, I will say that. Once you glop it on and let it cure for a couple of hours, the old paint comes up relatively easy. But stripping (how many times can I say that in a post? Let's go for the gold, shall we?) is super labor intensive. And messy. Here we are, 3 days later, and I'm still not done. Stripping, that is. I'm still not done stripping.

So this is where I invite all you internet and real-life friends to come on over for a stripping party. Sounds fun, right? There will be absolutely no poles in sight and I must insist you stay fully clothed, but I will provide you with oreos and a little protective mask. Sound good?

Monday, April 30, 2012

Frenchy, aka my new dresser {Before & After}

A little Before & After action for your Monday. 

BEFORE

AFTER


I found this great French Proverbial dresser on Craigslist a few weeks ago. I was a little surprised that hubby agreed to it, because of the curvy lines, but was really excited that he did. So home it came, and I got to work. 


The biggest bonus of this piece? The guy who sold it to us had already sanded the whole thing down! That saved me a TON of time. I actually really like the way the wood looks like this, but it wasn't what I was going for in our room, where this beast will live. If I had bought it to use as a buffet somewhere else in the house, I might have just sealed it and left it all beat up like this! 


Here's Frenchy in our room:


It must be noted that the lighting in our master bedroom is awful. Our whole house, really. This is why I can't keep a house plant alive, no matter what I do. Soo, the color is slightly off in these pics.


I didn't prime it, but I started off with a light coat of white, so that some if it would peek through when I distressed it. Then I used this great greige color I found in my stash. It was a mistint, so I couldn't tell you the color, but I LOVE it. It matches so perfectly in our weirdly "decorated" bedroom.

I swear, this room has been so tough for me. I did nothing in order, had no sort of real plan.. ugh. Not the way to do things. But with the addition of this dresser, it does continue to help lighten things up in here with our dark slate walls. You can see a peek of our bed below. It goes great with it, without being to matchy-matchy.


After two light coats of the greige, I lightly distressed the whole piece and then did a light stain- Ralph Lauren's Smoke Glaze. I didn't want the distressing to be too heavy, so this was perfect.


I also switched out the hardware and lined the drawers with some textured grasscloth liner. 


So what do you think? I love it!

Maybe someday (before we eventually move) I'll show you our whole room. Don't hold your breath, though! :)

Linking up:
Related Posts Plugin for WordPress, Blogger...