Showing posts with label Painting. Show all posts

Wednesday, July 3, 2013

New House: Paint Colors

(L-R) Gray Owl, Coventry Gray and Chelsea Gray
So this past weekend our new house got painted! Honestly, it was all a bit of a whirlwind last Friday, when I HAPPENED to call our builder to check in and see what was next on the books. That's when they let me know that a crew was there painting and would be done painting the whole house this weekend. SAY WHAT!?

Luckily I basically already knew what I wanted, but I still wanted to see some paint samples up on the walls before making the final decision. I had already decided to go with Benjamin Moore's Decorators White for the cabinets and trim, so by the time I got there they had already been painted. Then it was a mad dash to hold up swatches in each room and narrow it down to a few choices. They told us we could pick TWO colors for the entire house (interior). SHHHMMMM. That's not easy, in my opinion, but we all know I'll be painting rooms in no time. Also? We have tall, vaulted ceilings in a few rooms, so the color would flow all the way up... I didn't want some weird, dark color on our ceilings. In the end, since the builder is a friend of ours, we got to choose 3 interior colors. (All Benjamin Moore paint. He's my boyfriend of the paint world).

SO! What did I pick??

Shocker Alert! I went gray. :)

I really wanted to keep things light and airy in the main rooms and have lots of natural light bouncing around. Gray Owl was the winner for the family room, kitchen and basically 87% of the house:


The middle pic above reads as purple, but it's definitely not. I think that last picture represents the color the best. Also? I am LOVING the light (unfinished) floors in that last picture!! It's totally opposite of the dark floors we've been planning on this whole time, but light wood floors have seriously been growing on me lately...

For the master bedroom and Evie's room, I went with a deeper gray- Coventry Gray. I knew I definitely wanted a medium gray for Evie's room, so I just went with the same color for our room. 


And for our third color choice, I went with Beach Glass. I really wanted the powder bathroom to be something different and fun, but then when it came down to it, did it really make sense to have our third color be only in one small room? So I ended up having them paint the upstairs bathroom the same color. Since there are no windows in either of these bathrooms and no lights, it was hard to get a picture of this color. It's actually a really pretty, soft blue/green.


So there you have it! It is amazing how different and REAL the house looks now that it's been painted. And I just got word that they've started installing our countertops, so we'll be heading over there to check it all out in just a bit!
 
 
Google Reader has peaced out! Follow me over on Bloglovin! 

Follow on Bloglovin

Friday, July 20, 2012

Stripping is for the birds.

So, I may be a little in over my head, here. Last weekend, a friend mentioned that she was looking for someone local to refinish some pieces of furniture. They couldn't get in touch with the guy who had done some pieces for them previously, and were ready to get these done.

So like the geniuses that we are, my hubby and I volunteered my services.

And this is where my dumb diy overconfidence comes to bite me in the @$$.


Here is the first piece when it arrived at our house. She had painted it yellow a few days ago, and it was a rush job. Our friends have a two and a half year old and a 4 month old. So she told me she knew she had rushed this- she was just so excited to get back to a project after a rough couple of months with a sleepless newborn. I can totally relate.

But now they wanted it black again (it was previously painted black). No big deal, right? WRONG.

This baby needed to be stripped. Not just a light sanding before painting... straight up stripped.

Folks, I have never stripped a piece of furniture before. I've definitely painted my fair share, but the pieces were either unpainted wood or I was able to just paint over some old paint. And there was no way I could just paint over this one.

I kind of want to poke my eyes out just thinking about it right now.

Once I realized this is what needed to happen, I went back to this great post about stripping furniture to read up on it and stopped by Lowe's to pick up some supplies. Only they didn't have the Citristrip I was looking for. Curses! So I grabbed something that looked similar and went home to get started.

Yeah, bad idea.

Folks, when you are looking for something specific and don't find it right away, get your baby and your sweaty rear back out into the 106* weather ASAP to get what you need. Don't waste your time staying cool in the A/C, trying out something you've never heard of before. BIG waste of time.


The Citristrip definitely works, I will say that. Once you glop it on and let it cure for a couple of hours, the old paint comes up relatively easy. But stripping (how many times can I say that in a post? Let's go for the gold, shall we?) is super labor intensive. And messy. Here we are, 3 days later, and I'm still not done. Stripping, that is. I'm still not done stripping.

So this is where I invite all you internet and real-life friends to come on over for a stripping party. Sounds fun, right? There will be absolutely no poles in sight and I must insist you stay fully clothed, but I will provide you with oreos and a little protective mask. Sound good?

Friday, July 8, 2011

Some Finished Projects

Time for a little housekeeping, aka Operation Project Dump.
I've been up to all sorts of little projects and wanted to share a few with you here!

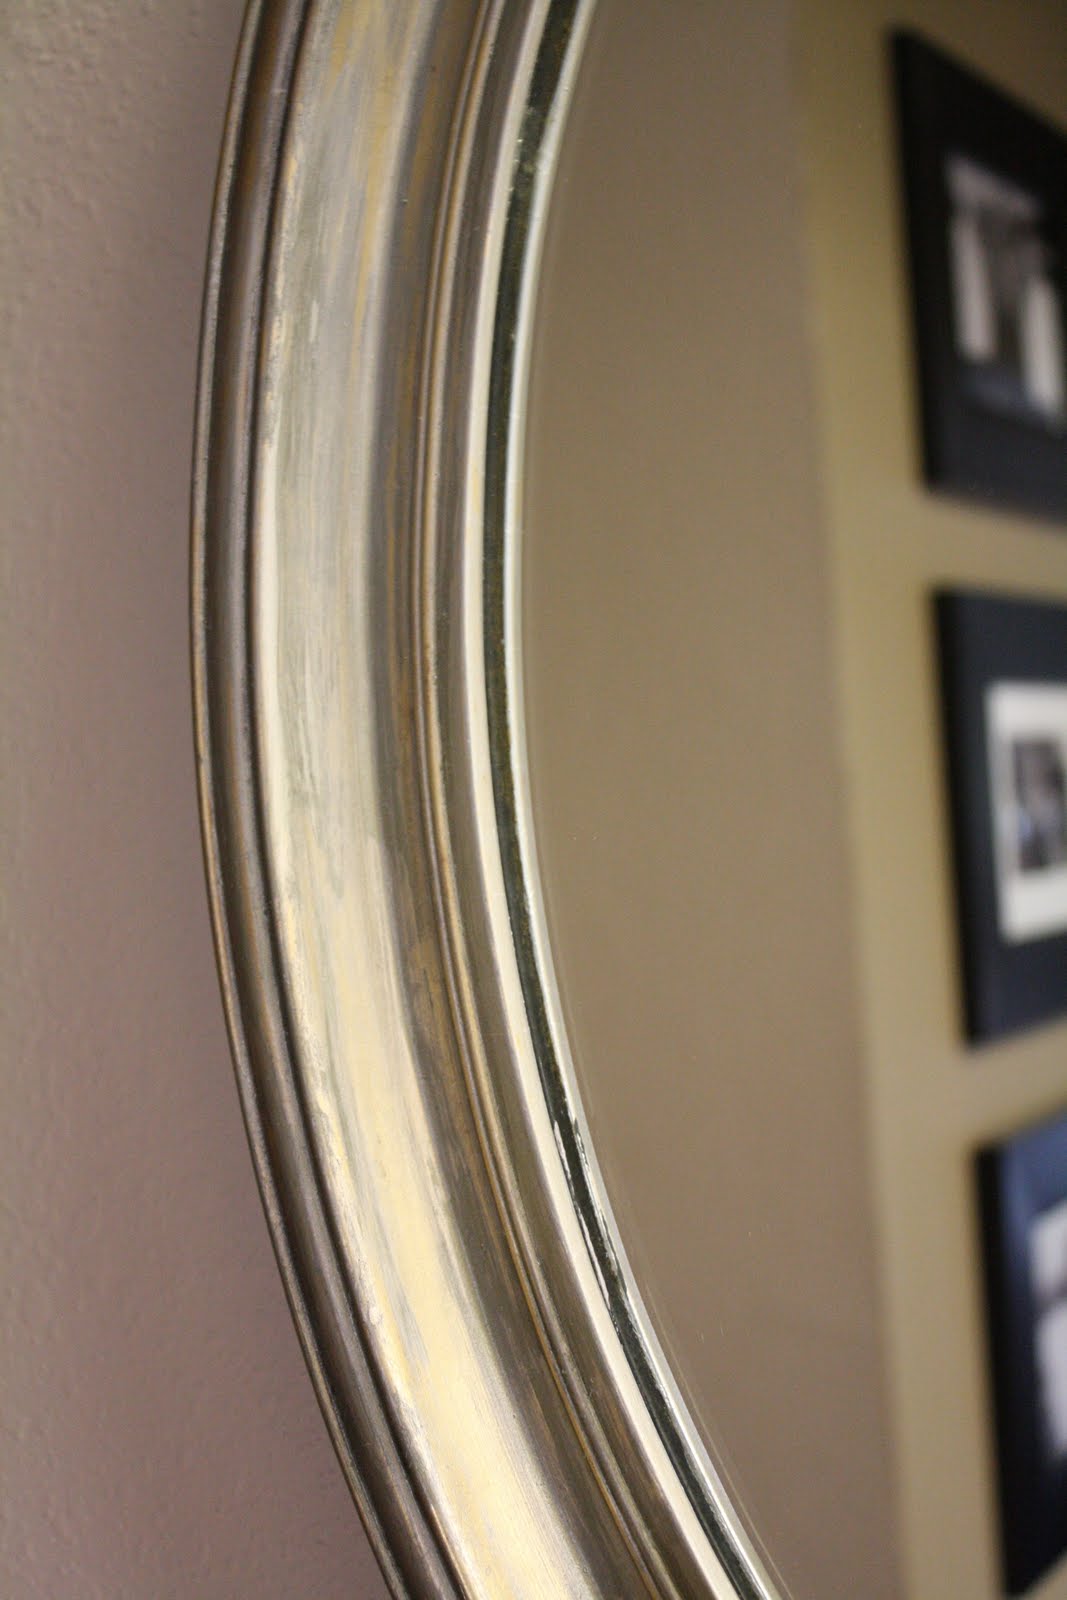
First up, this $8 mirror that I scored at a church rummage sale a few weeks ago. I actually kind of liked the gold metallic finish, but it just doesn't go with anything in my house. 

Gratuitous leg shot is a gift from me to you. Enjoy.

After a little faux silver leafing, black stain and some distressing, she fits in much better with our decor.
Not that you can really tell by these stellar pictures. Mirrors are hard to photograph!


Some of the gold peeks through because of the distressing I did, but I like it!


Next up is this little tray I made over. I found it in Hobby Lobby's clearance section (along with a bunch of other great stuff!) and knew I could make it over to sell in our booth.

After some white paint, a few painted stripes and distressing, I like this baby MUCH better!


I don't have a Before picture of my last project.. but they were another Hobby Lobby clearance score. Originally these hooks had a fleur d'lis painted on the front. I just painted right over it and then attached these metal numbers. 

The numbers stand for the ages my husband I are if you calculated it by how much water we drink daily, our sun exposure and how much sleep we get each day. 


Can you guess which one of us is 41???


Total BS up there on the numbers. Just some random numbers I picked. 
Wink Wink.

So what projects have you been doing? Do share!


Linking up:

Thursday, May 26, 2011

Living Room Redesign

Living Room Redesign.. doesn't that title sound so.. official?? Like I'm all business and professional and on top of it??

HA!

I have been dying to re-do our living room for ages. Basically it's a room that has gone unused the entire time we've lived in our house. (It's our second "living space" and the family room is right off the kitchen, so that's where we spend all our time). I mean, I can probably count the number of times I've actually sat in there on one hand. Sad. But it's the first room you see when you walk into our home, do decorating it was always important to me. Since our family has grown, I find the definite need to make use of all space that we have. Cue the room re-do!

My vision for the room and it's use is really to have as much floor space as possible. Evie will be crawling soon, and I just want space for her to get down on the floor and play. As you can see, this room had a huge sofa and coffee table that was taking up all the floor space.

These pictures are the before the befores. This is right after we moved in 2 1/2 years ago. The feature wall was painted when we bought the house. Basically we stuck whatever we had in here to fill up the space.

Two summers ago I painted the room blue (a Ralph Lauren color.. can't remember the exact name) and that monstrous red couch got a new slipcover/upholstery job that you might remember. I never bothered taking real photos of the room because I wasn't in love.. but here's a picture of the wall color:


This chair will also be getting a (second) makeover somewhere down the line.

So last week Salvation Army came and picked up the sofa and we've loaned my beloved coffee table to some good friends for the time being. This coffee table is arguably my favorite piece of furniture that I've ever owned. The best part about it is that it was completely free! A family I used to work for gave it to me when it didn't sell in their garage sale. And let me just say.. it's a high end piece and I would never have bought it for myself brand new!

So with those large pieces gone, the room immediately felt larger. Progress!

Last fall I posted a few inspiration images I had for the room. I have long loved gray and thought it would be a great paint color choice for the room. I always try to really live in our home and decorate/paint as I want, but in the back of my mind, I do know that we'll move in a few years, so I don't want to do anything too out there that we'll have to undo later. To me, gray is definitely a neutral, so that's what I went with.

Over Mother's Day Weekend, Spectrum Paint was having a Facebook Deal for buy one gallon, get one free on their Benjamin Moore Paint. Total score. After a few samples, I decided on Platinum Gray. Can't find the color on the BM website for some reason.. sorry!

Fast forward another week, and the room is painted!! Ahhh, better already!


A few things about the above picture..
  • The mantle is being painted as we speak.. er, type. It will be a crisp white, which I think will look fab against the gray.
  • Sorry for the mess, the entire room is in disarray.
  • You can see a sneak peek of our new rug!! More on that to come!!
I'm loving the color so far and am so excited about getting to decorate the whole room! Of course, everything will be done on a pretty tight budget. No major furniture purchases in my future.

Who knows when I'll be completely done with the room... But I'm hoping to share projects with you as I go along.

Have you painted anything lately?? Hope you all have a great Memorial Day Weekend!

Sunday, November 21, 2010

Nursery 0.5: Dresser

I've been working very hard lately, trying to get all of the last details finished on this baby girl's room! It just seems never ending... but that's clearly my own fault. :)

So a few things to share..


Dresser/Changing Table

We scored this dresser off of Craigslist, oh, about 4 or 5 months ago.. maybe even longer. I knew I could refinish it and make it into what we needed. It just took me a while! It's been finished for a long time, just hadn't made it's blog debut until now!

Before:


After:

I sanded her all down, mixed up my own paint color with paint I had on hand in the garage, then distressed it and used a glaze to get the look I wanted. I'm really pleased with how it turned out!

I switched out the hardware with cheap pulls I found at Hobby Lobby and then spray painted.


I lined the drawers with some grass cloth wallpaper that I found at Goodwill.
$3 for an enormous roll!

My total cost for this dresser re-do was about $65-70. Not bad!

Another sneak peek..

I made these tissue paper poufs to hang above the crib as Tiny Dancer's mobile! I was hoping to incorporate a few more colors, but I looked everywhere trying to find just the right colors.

And by everywhere, I mean I looked all 3 times I was at Target this week.

But I love how they turned out!

Linking to: DIY Show Off

Wednesday, March 3, 2010

Tick tock you don't stop


Oooooo, ooh ooh ooh ooooh ooh...

Get your minds out of the gutter. There wasn't a more fitting title than this- filthy school bus lyrics and all. Ah, the 7th grade...


I'm sure by now you have all seen this clock in the Pottery Barn catalog:


Love it. LOVE it.

Naturally, it's not for sale. None of the awesome accessories in their rooms ever are, are they?... but I guess if it did have a price tag on it, it would be somewhere in the four hundred and gimmeabigfatbreak range, which is just beyond my decor budget this week. So I decided I could make my own.

HMMPH.

And I totally did. Be prepared to be amazed. ;)

Lots of gratuitous clock pictures to follow. No actual time-telling is involved.


First, I went to the hardware store to pick up some wood and roamed around for about 20 minutes looking for some guy in an apron to cut it down to size for me. After running into another lady and her daughter who were looking for the same aproned man, I got a little peeved and started shouting down the aisle at a group of workers who clearly had nothing better to do than lean on the customer service counter at the front of the store. No way was I gonna walk the length of a football field carrying an 8x4 piece of wood just to tap some guy in an apron on the shoulder and then walk all the way back to the community saw when my lungs would do the job just fine. The other lady was very appreciative and I think it's safe to bet that I'm that little girl's newest role model. Just doing my part.


Back home, I set up shop in front of the TV (watched My Sister's Keeper.. totally cried all over my art project, but it was worth it) and got to painting.


I scrounged around in the garage for whatever paint we had on hand and mixed up a light, creamy color to start. I've also been hitting up the mismatched paint section whenever I go to Home Depot or Lowe's for small cans of colors I like and can mix. I highly recommend this. Just a little crafty tip from me to you.

My next layer was a little lighter and watered down, for a slightly white-washed look to age it up a bit.


I didn't take any pics of the next step, but I used a box cutter and a flathead screwdriver and hammer to gouge little cracks in the grain of the wood. Then I got out some craft paint in brick red, yellow and a wrought iron gray color. I read another blog post somewhere along the line of a lady who also made this clock, and all I can remember is that she used red and yellow paint to create the rusted look in the cracks, so I thought I should too. I wasn't loving the ketchup and mustard look, so I rubbed the color using a rag just barely dipped in water to tone it down a bit. Then I went in with the blue/gray for some more dimension.


On to the numbers! I printed out an X, V and two I's to do all the numerals. I used a push tack and a piece of string to lightly draw the outer circle and line up where each numeral should go. I just lightly painted in the numerals with a black/gray paint mix and didn't worry about getting it too perfect.

Looking good! But she needed a little more aging, so I busted out the glaze:

Ahhh, much better!


Here she is in her new home in the dining room:


Don't mind my dead plants.. I can't keep a plant alive to save my life.

You like??


Saturday, January 30, 2010

P is for Project

Hello, my name is Aja and I have a little... problem.

With projects.

This comes as no big surprise to me and virtually none to my husband by now, either, but I like to.. as they say.. have more than one iron in the fire when it comes to any kind of project. I just have so many ideas in my head! I'll start 2 at a time or want to rush ahead and begin something new when the first is only half way done.

Sigh... I'm working on it.

Sort of.

So I'm sure you were all expecting Part 4 in the wildly exciting internet sensation that is my Guest Bathroom Facelift. Sorry folks.

Frankly the idea of steaming my DIY shower curtain for pictures just isn't lighting my fire at the moment, so you'll have to wait a bit. But I promise I will deliver!!


So anyway, with our recent Winter Weather situation, I was able to work from home on Thursday and Friday (cue the Hallelujah choir) and had time to cross off and add to my little project to-do list.


First up: my knock-off Pottery Barn pillows. Yes, I know, these debuted quite a while ago, but well... I've had this linen fabric and wooden buttons for about 3 or 4 months with the intention of making them!

You see! Too.Many.Projects.


What do you think?? I won't go into details with how I made them.. email me if you want a full run-down.


What was that?

In the background of my pic?...

Huh?

You see what??..


Oh, yes. I see what you're pointing out there. PAINT.

Yup. Moving right along. I started painting our family room (or living room?? I haven't decided it's proper name. Add to list) last night. It was time. It feels right. I like the current color (that we painted a mere year ago), but our couch and chair (not pictured) are too close to the same color and it all blends together into blah blah land. (Sorry for all the parenthesis)


So this is where you'll find me this weekend. Semi-snowed in and getting high on paint fumes. How's your weekend shaping up? Are you snowed in, too?

Wednesday, January 20, 2010

Guest Bathroom Facelift: Part 2

Next up in my little Guest Bathroom Facelift, is the artwork. Because what powder room would be complete without some fancy-shmancy DIY art on the walls?

To read the eternally exciting GB Facelift: Part 1, scroll down or click here.


Step One. Find some random art pieces on clearance at TJ Maxx. These babies fit the bill:


Step Two. Lurk around in bloggy-land and find yourself some inspiration. I've always loved the work of this talented lady. (She's even doing her own bathroom makeover right now. Ack! Pressure!) I especially love this and this. Both are on my project to-do list, especially since she has been so kind as to offer up step by step instructions!!

I also came across a PB canvas piece a long time ago that was very graphic and used only numbers, which is ultimately what I went for..


Step Three. ¡De Colores! :) I couldn't resist. Translation: I painted. I had to do multiple coats to cover up the old artwork and just mixed my own formula of paint with both acrylic craft and interior wall paint. I'm sure that's against some sort of artistic rule, but I'm not losing any sleep over it.


Step Four. Print off some numbers in varying sizes, cut them out and lightly trace onto your art piece. Then paint some more. I decided to personalize it a bit by adding our wedding date: 5.3.08.


Step Five. Hang the pictures and then turn 180 degrees and realize you need something on the opposite wall. Right. Now.

I picked up these Vintage Keys from Pottery Barn last fall. I wasn't sure how/where I was going to use them, but I loved them and for 19 bucks, I figured I could splurge and use one of my year and a half old wedding gift cards. So I did.


Step Six. Get crafty. I finally decided what I wanted to do, so I hit up the Goodwill and found 2 sets of matching frames with ugly pictures for a total of $8. I ditched everything but the frames and cardboard backing and once again broke out the paint. I decided to distress the frames by sanding the edges and giving them a little Ralph Lauren Smoke Glaze love, thanks to the inspiration of these ladies. Next comes burlap and the hot glue gun, and after about an hour and a couple of burned fingertips, I ended up with this:


Step Seven. Stand back and admire your handiwork. Go poke your husband in the ribs and nod in the general direction of the bathroom until he goes in there and checks it out and showers himself with praise for marrying a crafty lady.


THE END.

(Of Part 2)


Edited to add: I've linked up to A Soft Place to Land's DIY Day and Today's Creative Blog's Get Your Craft On! Go check out some other great projects!
Related Posts Plugin for WordPress, Blogger...